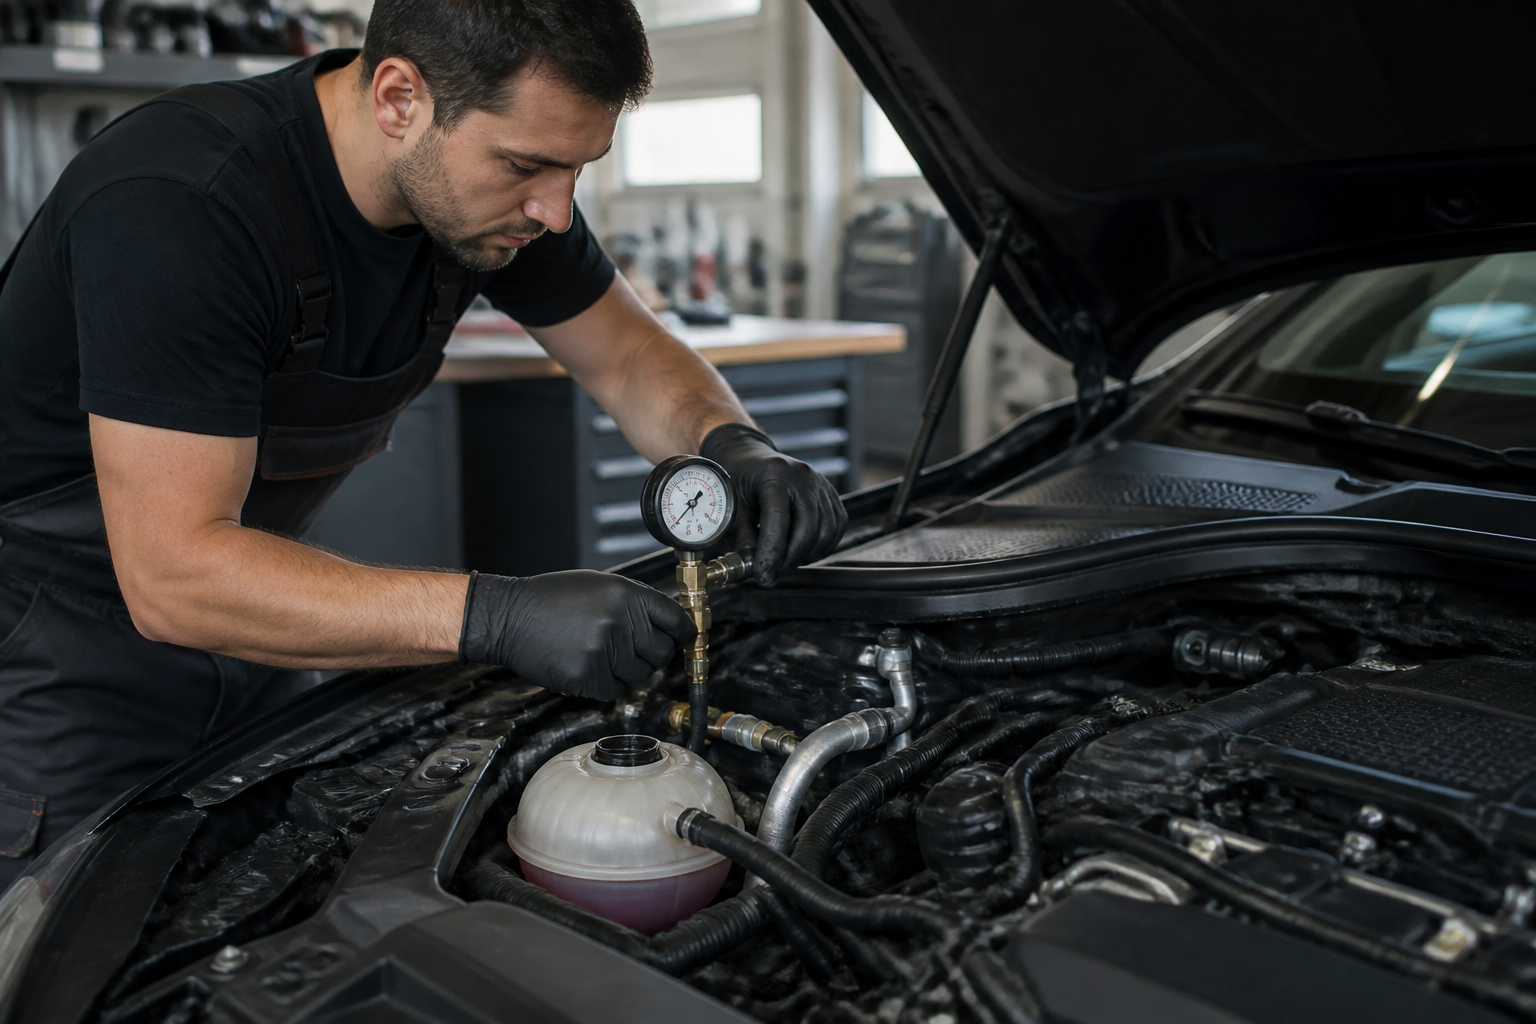
Begin with a cold coolant level check, then perform a pressure test to see if the system leaks under pressure. Use symptom clues (heater performance, odor, temperature behavior) to map likely culprits such as the expansion tank/cap, hoses, thermostat housing, water pump, or radiator seams. If no external leak is found, use a dye test or combustion-gas test to confirm internal loss or head-gasket issues before replacing parts.
Key takeaways
- A pressure test is the most reliable next step after initial level/visual checks for a Mercedes coolant loss.
- Symptom mapping helps pinpoint culprits without unnecessary part replacement.
- If external leaks aren’t found, dye or combustion-gas testing is warranted to rule out internal issues.
- Common leak zones include expansion tank, hose connections, thermostat housing, water pump, and radiator seams.
- Avoid assuming a single part failure; document findings and test results to guide the repair plan.
Cooling-system integrity is a frequent sticking point for Mercedes-Benz owners, especially when coolant appears to vanish without a telltale puddle under the vehicle. The practical answer isn’t guesswork or part swapping; it’s a disciplined, step‑by‑step diagnostic process that uses pressure testing and symptom interpretation to map clues to the most probable culprits. This article expands the diagnostic framework, illustrating how to verify coolant loss and identify the likely failure source, with emphasis on evidence gathered from the system itself and practical maintenance reasoning that applies to common MB layouts.
Structured diagnostic objective
Before you replace parts, establish a clear objective: confirm whether the cooling system is losing coolant, determine if the loss is external or internal, and pinpoint a likely component to replace if a leak is confirmed. Adhering to a repeatable method reduces unnecessary parts swapping and helps you allocate labor and parts cost more effectively.
Initial checks: baseline readings and visual cues
Start with a cold engine to avoid scalding and to obtain an accurate baseline. Steps include:
- Check coolant level in the expansion tank and, where applicable, the radiator surge area. Note the level relative to the marked hot/coolant lines.
- Inspect hoses and clamps for obvious signs of wear, cracking, swelling, or seepage. Pay attention to quick‑connect fittings, as Mercedes systems often use multiple barbed or press‑lock connections.
- Look for dried residue at hose ends, fittings, and around the expansion tank seal, which can indicate slow leaks that hide under pressure.
- Inspect the radiator cap or expansion-tank cap for a compromised seal or incorrect venting behavior, which can cause hidden loss or pressure inconsistency.
- Observe heater performance and cabin-defroster accuracy. Inconsistent heat or delayed defrost can signal air pockets or slow leak routes within the cooling loop.
The pressure test: the pivotal diagnostic step
A pressure test pressurizes the cooling system beyond normal operating conditions to reveal leaks that are not evident at idle. When performed correctly, it distinguishes between external leaks, internal losses, and head‑gasket risk scenarios. Practical notes:
- Ensure the engine is cool. Attach a suitable pressure tester to the radiator cap or expansion-tank port, following your vehicle’s service documentation for the correct test point.
- Increase pressure gradually to the Mercedes‑specified test value. If you don’t have the exact spec, a conservative approach is to test at or just above the system’s normal operating pressure, typically in the 1–2 bar range for many MB configurations, but verify against your model’s manual.
- Monitor for the appearance of leaks at joints, hoses, radiator seams, and the cap area. A tiny seepage at a clamp or an O‑ring seat may be the root cause; note all observed leaks with pressure duration and temperature conditions.
- Record any drop in pressure over a defined period (for example, 5–10 minutes). A stable pressure with no leaks largely rules out external loss and suggests internal issues or a non‑pressurized path.
If a leak is found during the pressure test, target the suspected area for repair or replacement. Common external sources in Mercedes systems include expansion-tank seals, hose clamps, hose segments near the thermostat housing, and radiating seams.
Symptom mapping: linking clues to probable culprits
- Falling coolant level with no visible puddle: external seepage, degraded hoses, or a loose/failed fitting is likely; confirm with a targeted leak test or dye trace.
- Sweet odor in the engine bay after driving: indicates coolant burning, possibly from a leak into the combustion chamber or a compromised exhaust path; pursue dye testing or a combustion-gas test if suspected.
- Inconsistent heater output or variable cabin temperature: could point to air pockets, slow bleed from a less-than-ideal bleed procedure, or a leak within the heater circuit.
- Rising engine temperature under load with adequate airflow: engine timing, a partially restricted flow path (thermostat, water pump, radiator core), or air pockets may be restricting coolant circulation.
- Visible steam or white vapor at the exhaust during startup or after a cold start: may align with coolant entering the combustion chamber, a red flag for internal loss that warrants more advanced testing.
Beyond the pressure test: when to advance diagnostics
If the pressure test shows no external leak but you still suspect coolant loss, or if you want to verify the absence of internal loss, follow a staged diagnostic plan:
- Dye testing: introduce a UV or infrared dye into the cooling system and use a blacklight or appropriate dye-tracking tools to reveal seepage paths that aren’t visible under normal light. This can pinpoint small cracks, O‑ring leaks, or seam weaknesses.
- Combustion-gas test: a diagnostic tool that samples exhaust for trace amounts of air from the cooling system. A positive result can indicate a head-gasket breach or a cracked head/block scenario requiring further disassembly.
- Cooling-system flow diagnostics: for persistent heat‑related concerns or suspected pump issues, verify coolant flow through the radiator and heater core with a flow meter or by observing temperature differentials across the core during a controlled test run.
Interpreting results and choosing a repair path
Aggregate the findings from pressure testing, dye testing, and symptom mapping to decide whether a simple seal/small part replacement will suffice or a more extensive repair is required. Practical decision criteria include:
- Leak location and accessibility: external leaks at hoses, clamps, or expansion-tank components are typically straightforward to repair or replace.
- Leak severity and frequency: slow, intermittent leaks may be amenable to sealing solutions or targeted hose/clamp replacements, whereas persistent losses under pressure point to a more substantive fix.
- Internal loss risk: evidence from dye tests or combustion-gas analysis suggesting coolant entering the combustion chamber or pressurized combustion path signals a head-gasket or engine‑block concern, which is a more involved repair decision.
- Impact on reliability and safety: if overheating is observed or coolant levels are unreliable, prioritize repairs that restore reliable cooling and engine protection.
Practical caveats and model-dependent notes
Mercedes-Benz models differ in cooling-system layouts, cap designs, and sensor placements. Always consult the vehicle‑specific service information for the exact pressure testing procedure, the correct test point, and the recommended pressure value. Some MB engines use integrated thermostat housings or compact radiator assemblies with multiple coolant paths; a leak at a seemingly minor clamp can involve a complicated seal or O‑ring assembly in a way that isn’t obvious at first glance.
Limitations to keep in mind: pressure testing may not reveal very slow leaks that only occur under long‑term thermal cycling or leaks that become evident only after engine warm‑up and return to operating temp. External tests won’t detect coolant entering the engine if there is a transient combustion‑cycle leak that seals briefly when the system is de-pressurized. Dye testing and combustion‑gas tests help close these gaps but require the right equipment and safe handling practices.
Summary of a practical workflow you can follow
- Verify baseline: cold engine, check expansion tank level, inspect hoses/clamps and caps.
- Perform controlled pressure test and observe for external leaks; record location and rate.
- If no external leak is found or suspicion remains high, proceed with dye testing to localize tiny leaks.
- If dye testing is inconclusive and symptoms suggest internal loss, run a combustion-gas test to assess head-gasket integrity or combustion‑chamber intrusion.
- Base repair decisions on the combination of leak location, test results, and symptom correlation; prioritize fixes that restore reliable cooling function and prevent overheating.
Sources
- Mercedes coolant loss without a driveway puddle: diagnose the leak before replacing parts
- Cooling System Diagnosis
Frequently asked questions
What are the first signs of a coolant leak and what tests should I perform first?
Look for a falling coolant level with no visible puddle, a sweet odor in the engine bay, or inconsistent heater performance. Start with a cold-level check, then a pressure test to identify external leaks before pursuing dye testing or combustion-gas tests.
When should I consider head-gasket or internal-leak testing?
If a pressure test shows no external leak but coolant continues to disappear, or there are signs like white smoke or coolant in the exhaust, perform a combustion-gas test or dye test to assess internal loss and head-gasket integrity.
Which components are the most common sources of coolant loss on Mercedes-Benz?
Expansion tank/cap, hose connections, thermostat housing, water pump, and radiator seams are among the frequently implicated areas in coolant loss scenarios.
How should I document a cooling-system diagnosis for a repair shop?
Record coolant levels at multiple temperatures, note all observed leaks with locations, capture the gauge readings during a pressure test, and include dye-test results if performed.
Can I delay repairs if the engine runs cool and heater works intermittently?
No. Intermittent cooling-system symptoms can precede significant damage. A structured diagnostic approach helps prevent missed leaks and potential head-gasket risk.
Related Mercedes-Benz guides
- Mercedes-Benz MB.OS explained: features, updates, and daily usability
- Charging Mercedes: home install, networks, and cost optimization
- Charging ecosystems and home installation for Mercedes BEVs
- Troubleshooting MB.OS and vehicle connectivity issues
- Mercedes-Benz telematics and diagnostics overview for owners